Tag Archives: Old School RuneScape

How to Create an OSRS Fletching Guide

For any ranged player in Old School RuneScape, maintaining a steady supply of ammunition is crucial. Running out of arrows or bolts during combat can be frustrating and costly, so mastering the Fletching skill is essential for long-term success. This guide will help you understand how to level up Fletching efficiently while building up a solid stockpile of ammo.

Fletching is the skill that allows you to craft ranged ammunition such as arrows, bolts, and darts. Beyond ammo, you can also make bows and crossbows, making it an indispensable skill for any ranged-focused player. The process involves gathering raw materials and combining them to create usable ranged weapons.

Gathering Materials: Preparing for Fletching

Before you start, you’ll need to collect the right materials. The Grand Exchange is your go-to place for buying items like logs, feathers, arrow tips, and bolt tips. However, the Grand Exchange has daily purchase limits, which can slow down your progress, especially at higher levels.

Here are some strategies to overcome these limits:

Stockpile Ahead of Time: Buy as many materials as your current limits allow before beginning your fletching session. Prioritize items suited to your current level and goals.From beginners to experts, everyone needs OSRS gold – shop with RSgoldfast today!

Use Multiple Accounts: If you have access to other accounts, use them to gather additional materials, effectively bypassing buy limits.

Trade with Players: Keep an eye on the market and trade with other players. Sometimes this can yield better prices and larger quantities.

Leveling Up: Fletching by Experience Ranges

Levels 1–20: Crafting Arrow Shafts

Materials: Any type of logs

Method: Use a knife on logs to carve arrow shafts. This is a straightforward, cost-effective way to gain your first few Fletching levels.

XP: Each arrow shaft grants 1 experience point.

Tip: This method is fast and low-cost, perfect for beginners.

Levels 20–35: Making Headless Arrows

Materials: Arrow shafts and feathers

Method: Attach feathers to your arrow shafts to create headless arrows.

XP: 1 experience point per headless arrow.

Tip: Feathers are plentiful, often dropped by chickens or purchased cheaply at the Grand Exchange.

Levels 35–55: Crafting Regular Arrows

Materials: Arrow shafts, feathers, and steel or iron arrow tips

Method: Add arrow tips to your headless arrows for higher experience gains.

XP: 2 experience points per arrow (1 for headless arrow + 1 for adding the tip).

Tip: This method balances speed and cost-effectiveness well.

Levels 55–70: Making Broad Arrows

Materials: Broad arrowheads and arrow shafts

Method: At level 55 Fletching and with the appropriate Slayer level, purchase broad arrowheads from Slayer Masters and attach them to arrow shafts.

XP: Broad arrows offer significant experience boosts, making this one of the fastest training methods.

Tip: Level your Slayer skill to unlock this method and boost your Fletching XP rates.

Advanced Fletching Options

Once you reach higher levels, consider these methods for faster or more profitable training:

Darts: Starting at level 1, darts can be made using feathers and dart tips. They provide quick experience and are popular for efficient training.

Bolts: From level 10, bolts can be crafted similarly to arrows and are valuable for crossbow users.

Magic and Rune Items: Higher-level players can craft magic and rune ammunition, which grants excellent experience and can be sold for profit.

Efficiency Tips for Fletching

Use Nearby Banks: Minimize travel time by training near banks to quickly deposit and withdraw materials.

Experience Boosts: Equip items like the Amulet of Glory or use experience lamps to increase your Fletching gains.

Complete Quests: Some quests offer Fletching experience rewards, helping you level up faster early on.

Market Awareness: Stay informed about supply and demand to buy materials at the best prices and sell your finished products profitably.Don’t wait any longer – enhance your OSRS gaming experience with our premium buy RS gold! Trust RSgoldfast for unbeatable prices and first-class service!

Fletching is an essential skill for any OSRS ranged player, ensuring you never run out of ammunition while also providing great opportunities for experience and profit. By following this guide, you’ll build a strong foundation in Fletching and progress smoothly toward crafting everything from simple arrow shafts to advanced bolts and darts.

Mastering the Safe Points in Glouphrie Road Dungeon – OSRS Guide

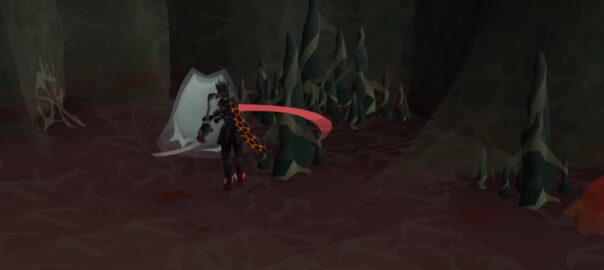
Old School RuneScape is filled with engaging quests and perilous locations, and the Glouphrie Road Dungeon is no exception. This treacherous area is home to formidable enemies and complex pathways, but with the right knowledge, you can navigate it safely. In this guide, we will explore key safe points within the dungeon, how to reach them, and essential tips for maximizing your survival.

To embark on your journey, head west until you locate the sewer entrance. While the idea of venturing into a hostile dungeon may seem daunting, there’s good news: the Level 121 Twisted Turtle at the entrance can be bypassed entirely. This means you can conserve your health and resources for more significant threats deeper inside.

Before progressing, check the status of the Soul Tree. If it hasn’t been healed, twisted roots will block your path beyond the second turtle. Ensuring the Soul Tree is restored allows for a smoother journey through the dungeon and prevents unnecessary backtracking.

Key Safe Points in Glouphrie Road Dungeon

Safe points are crucial in dangerous areas like the Glouphrie Dungeon, offering spaces where players can regroup, heal, and plan without constant enemy aggression. Buy OSRS gold with RSgoldfast and conquer new challenges! Below are the most important safe zones you should utilize.

1.Caged Corridor – The First Safe Zone

    Location: Midway through the dungeon

    How to Use: Close the gate behind you to prevent enemies from entering

    The Caged Corridor serves as the first major safe point along your journey. By entering and sealing the gate behind you, you can prevent enemies from pursuing you, creating a temporary respite from combat.

    While here, take the opportunity to:

    Heal up and replenish supplies

    Review your equipment and adjust your strategy

    Plan your route for the next section of the dungeon

    2.Safe Corridor – Pre-Final Area Rest Spot

      Location: Just before the final battle room

      How to Use: Stay inside to avoid enemy engagement

      As you delve deeper into the dungeon, you will reach the Safe Corridor, a larger area designed for regrouping before the final showdown. This space is ideal for:

      Restocking and preparing for the intense battles ahead

      Interacting with other players to exchange strategies and resources

      Reviewing combat tactics to ensure optimal performance in the upcoming fight

      3.Pillar Safe Point – Strategic Battle Positioning

        Location: Within the Battle Room

        How to Use: Use pillars for cover while engaging enemies

        The Battle Room is where the most intense combat takes place, but it also holds a critical strategic advantage: the Pillar Safe Point. This feature allows you to use large stone pillars as natural shields against enemy attacks while still positioning yourself to strike effectively.

        How to Use the Pillar Safe Point Effectively:

        Avoid direct engagement: Position yourself behind the pillar to minimize incoming damage.

        Time your attacks: Strike when the enemy moves out of their attack stance or repositioning.

        Manage your resources: Using this tactic conserves food and potions, ensuring longevity in battle.

        Expert Tips for Navigating the Glouphrie Dungeon

        To optimize your dungeon experience, follow these key survival strategies:

        1.Always Be Prepared

          Before entering the dungeon, stock up on essential supplies, including:

          High-healing food

          Prayer potions (if utilizing Protection Prayers)

          Stamina potions for enhanced mobility

          Teleportation options in case of emergencies

          2.Understand Your Enemies

            Knowing your foes’ attack patterns and weaknesses can significantly improve your efficiency. Prioritize learning about the Twisted Terror Bird’s ranged attacks and the Twisted Turtle’s movement to avoid unnecessary damage.

            3.Use Safe Points Wisely

              Take full advantage of each safe zone. Rushing through without restocking or healing can leave you vulnerable when facing tougher enemies.

              4.Consider Teaming Up

                Facing the dungeon alone can be challenging. If possible, join forces with other players. A coordinated group can:

                Share resources

                Provide backup in combat

                Enhance overall survival rates

                5.Stay Alert and Monitor Your Health

                  Always be aware of your surroundings, check for environmental hazards like sticky tar spots, and monitor your health closely. If things go south, don’t hesitate to retreat to a safe point.

                  The Glouphrie Road Dungeon is a test of skill, strategy, and preparation. By leveraging safe points such as the Caged Corridor, Safe Corridor, and Pillar Safe Point, you can navigate this treacherous area with confidence. Whether you choose to play solo or team up with allies, a well-thought-out plan will always be your greatest advantage.

                  Don’t let gold grinding slow you down – get buy OSRS gold instantly at unbeatable prices, only at RSgoldfast! Prepare wisely, strategize effectively, and conquer the challenges of the Glouphrie Dungeon like a seasoned adventurer!

                  From Scratch: Conquering Free-to-Play OSRS as an Adventurer on a Quest for Power

                  Old School RuneScape (OSRS) offers a world brimming with content that can feel both exhilarating and overwhelming. The game’s vastness, filled with countless achievements to complete, rare items to acquire, and places to explore, can be a lot to tackle. As a player, I’ve decided to take on the ultimate challenge—starting fresh in the free-to-play (F2P) world and working my way up without any initial advantages. My primary objectives? To defeat the Hill Titan and Brio Fighter MOs, the powerful giants lurking in the wild, and to claim their unique weapons—the Hill Giant Club and the Brio Fighter Staff.

                  With nothing but the clothes on my back and my hands on the mouse, my journey begins from scratch. My two goals are clear, but how can I achieve them? It’s simple: I’ll need RuneScape gold, the foundation of OSRS’s economy. As a new player in F2P, I’ll explore the best methods for earning gold and maximizing profits while progressing through the game’s mechanics, eventually defeating those bosses and claiming their mighty weapons.

                  In this article, we will look at the journey so far, covering some of the best F2P money-making methods, grinding techniques, and my current progress as I work toward my goals. So, let’s get started!

                  The Gold Grind: Building the Foundation

                  After the first 20 hours of gameplay, I finally unlocked full access to the Grand Exchange. With that key milestone achieved, I immediately turned my attention to maximizing my gold income using the best F2P money-making methods.

                  The first method that stood out to me was mining Runite ore. Although this method requires a bit of patience, it can be very rewarding. I spent about five hours farming Runite miners, and during that time, I gathered 98 Runite ores. For any F2P player looking to get a bond or simply bulk up their bank account, I highly recommend mining Runite ores. In those five hours, I earned a significant sum of gold. Runite ores are highly valuable in the game, and with patience, they can easily be turned into big profits on the Grand Exchange.

                  With that gold, I invested in some Chaos runes to level up my Magic skill. Spending about 120,000 GP on Chaos runes, I worked my way to 48 Magic, aiming for the coveted High Alchemy spell. This spell would allow me to convert items into gold, offering another reliable source of income. After grinding for a while, I hit 50 Magic and continued my efforts to reach 55 Magic, which would unlock the ability to cast High Alchemy.

                  During this period, I noticed a slight issue. Some of the items I was buying were more expensive in stores than on the Grand Exchange. For example, I purchased adamant arrows from the store for 80 GP each but saw they were only worth 12 GP at the Grand Exchange. These discrepancies can make the process of flipping items tricky, especially when there’s competition. But it’s all part of the learning experience in OSRS!

                  Canoes and Wilderness Adventures: Unlocking More Methods

                  Once I reached 57 Woodcutting, I unlocked the ability to make the Wakka canoe, a convenient way to travel directly into the Wilderness. The Wilderness is home to some of the most lucrative (and dangerous) resources in OSRS. But my primary focus here was gathering steel platebodies, which I could High Alch for a solid profit.

                  The Wakka canoe is a tool I haven’t used much in recent years, but it offers a unique way to travel in the game. The goal was to travel to the Wilderness, collect steel platebodies from the various monsters in the area, and High Alch them for 1.2k GP each. While the Wilderness can be a risky place—full of player-killers and dangerous creatures—this money-making method was a great way to grind for gold.

                  Within just 30 minutes, I had collected enough platebodies to make over 100k GP. A solid hour of farming and alching gave me around 140k GP in profits, plus valuable Magic experience. While this method isn’t the most efficient, it’s certainly worth considering for any player looking to make decent money in F2P, especially if you’re willing to spend the time and take the risks of the Wilderness.

                  The Road to Prayer: Protecting My Progress

                  As I worked toward my goals, I realized that I would need to level up my Prayer for essential defensive abilities, particularly the Protect from Missiles and Protect from Magic prayers. With the gold I had accumulated, I bought the necessary bones and used them at the altar to reach 40 Prayer. With that, I unlocked the prayers that would allow me to safely traverse the Wilderness, where many high-level bosses reside.

                  Armed with these protections, I ventured into the Wilderness, where I began hunting Hill Giants. This would be my next step toward acquiring the Hill Giant Club, a critical piece of the puzzle. Over several trips, I collected five giant keys, which would unlock access to further adventures. The grind was slow, but it felt rewarding to see my progress.

                  New Money-Making Methods: The Archery Supply Flip

                  Around this time, I discovered another promising money-making method involving archery supplies. This method requires buying items like Maple longbows, Oak longbows, and Adamant arrows from the Grand Exchange and selling them to Brian’s Archery Store in Remington. It seemed like a simple flipping strategy with the potential for decent returns.

                  However, after a few hours of testing, I noticed that the market was competitive. Maple longbows were already being heavily sold across every world, which severely limited their profit potential. The Oak and Willow longbows, along with Adamant arrows, were still viable options. With a modest investment of 110k GP, I was able to flip these items for around 23k GP after just five world hops. After selling off several hundred of these supplies, I managed to earn a profit, although I would have preferred a more lucrative market.

                  Achieving New Milestones: Progress and Setbacks

                  By the end of this session, I had achieved several milestones, including reaching 55 Range and obtaining the necessary keys for the Skull Scepter. The Skull Scepter is a crucial tool that would allow me to teleport directly to the entrance of the Stronghold Security. Unfortunately, I learned the hard way that the Skull Scepter only has limited uses—something I didn’t realize until I had used up all its charges. This was a significant setback, but it was also a valuable lesson in the intricacies of OSRS mechanics.

                  Despite this mistake, I managed to continue my grind, working my way toward obtaining the Brio Fighter Staff and Hill Giant Club. The work wasn’t easy, and there were setbacks along the way, but I’m closer than ever to reaching my goals.

                  Conclusion: A Long Road Ahead

                  As of now, I have spent a total of 51 hours on this journey. My stats include 10 Strength, 56 Range, 40 Prayer, 56 Magic, and 57 Woodcutting. I’ve collected 11 Giant Keys and 1 Mossy Key, and I’m steadily progressing towards my ultimate goal: defeating the Hill Titan and Brio Fighter MOs to claim their unique weapons.

                  The road ahead remains long, but each step I take brings me closer to achieving my dreams. Whether it’s refining my cheap OSRS gold-making methods or advancing my combat stats, there’s always something new to learn and explore in OSRS.

                  The Safest Way to Buy OSRS Gold at RSorder: A Step-by-Step Guide

                  Old School RuneScape (OSRS) is a beloved MMORPG where gold plays a vital role in a player’s progression. From upgrading gear to training skills, OSRS gold is required for almost every aspect of the game. If you’re looking to buy OSRS gold safely, RSorder is one of the most reliable platforms for this purpose. In this guide, we’ll walk you through the process of buying gold on RSorder securely, ensuring that you make the most of your purchase without compromising your account’s safety.

                  Why Choose RSorder?

                  RSorder has earned a strong reputation in the OSRS community for being a trustworthy and reliable provider of OSRS gold. Here’s why it stands out:

                  1. Trusted Reputation: RSorder has been in the gold-selling industry for years, serving thousands of players worldwide. Their customer reviews and ratings reflect their reliability.
                  2. Secure Transactions: RSorder uses advanced security measures to ensure your personal and payment information is always protected.
                  3. Fast Delivery: Once you complete your order, RSorder guarantees that your gold will be delivered quickly, often within minutes.
                  4. 24/7 Customer Support: If you ever encounter issues, RSorder’s customer support team is available around the clock to assist you.
                  5. Competitive Pricing: RSorder offers some of the most competitive rates for OSRS gold, ensuring that you get the best value for your money.

                  Steps to Safely Buy OSRS Gold at RSorder

                  Follow these steps to purchase OSRS gold securely and quickly from RSorder:

                  Step 1: Visit the RSorder Website

                  Start by visiting RSorder, where you can easily navigate to the OSRS gold page. The website is well-organized and user-friendly, allowing you to find what you need without any hassle.

                  Step 2: Select the Amount of OSRS Gold You Need

                  Once you’re on the gold page, you’ll be presented with several options for the amount of gold you want to purchase. RSorder offers a wide range of gold bundles, from small amounts for beginner-level upgrades to larger quantities for high-end equipment or skills training. Choose the amount that best suits your needs.

                  Step 3: Choose Your Payment Method

                  RSorder supports a variety of payment methods, including credit cards, PayPal, cryptocurrencies, and more. Select the payment method that you’re most comfortable with, making sure that it is secure and convenient for you. RSorder ensures that all payment methods are encrypted and safe from fraud.

                  Step 4: Account Details and Delivery Method

                  After selecting your payment method, you’ll be prompted to enter your account details for the gold delivery. There are typically two options for receiving your gold:

                  • Face-to-Face Trade: This is the most common method, where an RSorder representative will meet you in the game world to transfer the gold directly to your account.
                  • Bank Deposit: In some cases, RSorder can deliver the gold directly to your in-game bank. Make sure to double-check the delivery method before completing your purchase.

                  Step 5: Complete Your Order

                  Before finalizing your purchase, review all details to ensure everything is correct. Once you’re confident in your order, complete the payment, and RSorder will begin processing your transaction.

                  Step 6: Enjoy Your OSRS Gold!

                  After completing the order, you’ll receive your gold promptly. In most cases, the delivery is instant, though it may take a few minutes depending on server load. RSorder’s customer support team is always available to assist if you experience any delays or issues during the process.

                  Safety Tips When Buying OSRS Gold

                  While RSorder takes every precaution to ensure the safety of your transaction, there are a few things you can do to further protect yourself:

                  1. Use a Secure Connection: Always ensure you are using a secure and private internet connection when making purchases online.
                  2. Enable Two-Factor Authentication (2FA): Protect your OSRS account by enabling 2FA through your Jagex account settings. This adds an extra layer of security to prevent unauthorized access.
                  3. Don’t Share Your Account Details: Never share your OSRS account credentials with anyone, even if they claim to be from RSorder. The gold delivery process is always handled by trusted RSorder staff.
                  4. Use Verified Payment Methods: Stick to well-known and verified payment methods when purchasing gold to ensure your transaction is safe.

                  Why RSorder is the Best Option for OSRS Gold

                  RSorder stands out not only because of its low prices and fast delivery but also because it prioritizes customer satisfaction and account security. Whether you’re a casual player who wants to get ahead or a veteran looking to save time, RSorder offers an easy and secure way to buy OSRS gold.

                  So, if you’re ready to enhance your OSRS experience, head over to RSorder, place your order, and get started on your next adventure in Gielinor with your new supply of gold!

                  OSRS Team Ironman: A New Frontier for Hardcore Gamers

                  For dedicated Old School RuneScape (OSRS) players, Ironman mode is a challenging solo experience. It pushes players to rely solely on their own skills, without any outside help or access to the Grand Exchange. Ironman requires careful resource management, patience, and mastery of the game’s mechanics. However, for players seeking an even tougher experience, the introduction of Team Ironman mode has upped the ante by adding the challenge of teamwork to the mix.

                  In Team Ironman, groups of 2 to 5 players join forces, creating a shared Ironman account where they must progress as a team. While the restrictions from traditional Ironman—no trading with other players or using the Grand Exchange—still apply, team members can trade resources and collaborate on skills and quests amongst themselves. This mode blends self-sufficiency with the need for coordination, as success depends not only on individual skill but also on how well the team works together.

                  “Team Ironman mode brings a whole new level of self-sufficiency,” says Alex, a seasoned OSRS player. “You need a deep understanding of the game mechanics, but you also have to sync up with your teammates to make the most of your efforts. It’s a real test of communication and teamwork.”

                  To create a Team Ironman account, all players must start from scratch on fresh OSRS accounts. Existing Ironman characters cannot be converted into Team Ironman, and every player must begin together from the Tutorial Island. Whether you want to purchase OSRS gold, buy RS gold, or fast-track upgrades, RSgoldfast has you covered. Once the team is formed, they can trade freely within the group, share responsibilities for skills, and coordinate their efforts for quests and boss fights. However, if a player decides to leave the team, their progress becomes locked, and they cannot join another Team Ironman group.

                  For those seeking an even higher level of difficulty, teams can choose Hardcore Ironman mode. In this version, a single death results in the permanent loss of the account. The added pressure means that a mistake by any team member could spell the end for the entire team’s progress.

                  “Hardcore Team Ironman is the ultimate challenge,” says Sarah, a veteran Hardcore Ironman player. “Not only do you have to navigate the game’s toughest content, but you also need to keep your team alive. It’s intense because every decision matters—you’re not just responsible for yourself but for your whole team.”

                  Despite the high difficulty, Team Ironman has become a popular mode in OSRS, drawing in players who relish the challenge of overcoming the game’s toughest obstacles together. Streamers and content creators have embraced the mode, sharing videos of their team’s adventures, highlighting the strategic thinking and coordination required for success.

                  “Playing in a team forces you to approach the game in a completely different way,” says Tom, an experienced Ironman player. “In solo Ironman, you’re self-sufficient, working at your own pace. But in Team Ironman, you’re constantly coordinating tasks and making decisions that benefit the entire group. It brings a social dynamic to the game that makes every victory feel even more rewarding.”

                  However, the mode isn’t without its challenges. Teams face not only the in-game obstacles but also the potential for disbandment due to real-life commitments, burnout, or disagreements among members. Unlike other modes, there’s no option to replace a departing teammate, so the success of the team hinges on maintaining strong morale and cohesion.

                  “Losing a team member is devastating,” says Alex. “You’ve spent so much time building shared resources and making progress as a group. Starting over is brutal, which is why teamwork and communication are crucial.”

                  Even with these difficulties, the OSRS community has rallied around Team Ironman, forming online groups and forums to share strategies, offer advice, and celebrate accomplishments. Discord servers and subreddits have sprung up, creating spaces where teams can discuss their progress and support each other through the game’s many challenges.

                  For hardcore OSRS players, Team Ironman represents the pinnacle of the Ironman experience. It pushes both individual skill and group coordination to their limits, offering a deeply rewarding experience for those willing to take on the challenge. As Sarah puts it, “It’s not just about surviving the grind—it’s about keeping your team together and reaching new heights together. That’s what makes it so exciting.”

                  In the world of OSRS, where perseverance and strategy are everything, Team Ironman provides a unique test of both skill and camaraderie, making it an unforgettable experience for the most determined adventurers.