Call of Duty: Black Ops 7 Zombies – How to Unlock Cursed Mode

Call of Duty: Black Ops 7 brings one of the deepest and most feature-rich Zombies experiences in the franchise’s history. Alongside the chaotic return of Dead Ops Arcade, Treyarch has introduced a brand-new challenge mode called Cursed, built specifically for players who crave intensity, old-school difficulty, and a stripped-down survival environment reminiscent of the early Black Ops era.

This guide breaks down everything you need to know about what Cursed Mode is, how it works, what changes you can expect, and how to unlock it once Black Ops 7 launches.

What Is Cursed Mode in Black Ops 7 Zombies?

Cursed Mode is Treyarch’s answer to longtime Zombies fans who prefer a harsher, more punishing experience without modern conveniences. It’s directly inspired by classic maps like Kino der Toten, Ascension, and Origins, where survival demanded map awareness, tight mechanics, and disciplined play.

Once you load into Cursed, you’ll immediately notice several dramatic gameplay changes.

Key Gameplay Changes in Cursed Mode

1. No Custom Loadouts – You Start With a Pistol

·Just like the classic days of Black Ops Zombies, you begin with nothing but a basic sidearm.

·No pre-equipped meta weapons.

·No optimized loadouts.

·Just you, your pistol, and a map filled with undead.

This forces players to rely on survival instincts, early-game wall buys, and efficient point management.

2. No Minimap

The minimap is completely disabled, forcing players to depend on audio cues, positioning, and map awareness. Zombies can flank you far more easily, making teamwork and communication essential.

3. Classic Black Ops 3-Style Points System

BO7’s streamlined points system is removed.

Cursed brings back the fan-favorite Black Ops 3 scoring system, rewarding:

·Tactical kills

·Limb shots

·Barricade repairs

·Efficient point farming

This creates a slower but more strategic early game where poor decisions can cost you an entire run.

4. Relics That Modify Difficulty

Cursed Mode features Relics, hidden items that add new difficulty modifiers. Examples include:

·Lower Perk-a-Cola limits

·Disabled ammo caches

·Reduced power-up drop rates

·Stronger zombie variants

Treyarch confirmed that new Relics will release each season, allowing Cursed Mode to evolve, escalate, and stay challenging over time.

Why Play Cursed Mode? Rewards, Progression, and Prestige

Cursed Mode isn’t just a tougher toggle-it has its own identity and reward ecosystem.

You’ll earn:

·Mode-specific power progression

·Increased Tier rewards

·Season-exclusive challenges and unlocks

·Long-term progression is tied directly to Cursed achievements

Treyarch positioned Cursed as a parallel progression path to regular Zombies-not just an optional difficulty setting. If you love mastering harder content and showcasing rare cosmetics or badges, Cursed offers a meaningful grind.

How to Unlock Cursed Mode in Black Ops 7 Zombies

Here’s the critical detail:

Instead, Cursed unlocks only after the global community completes the main Zombies Easter Egg. This includes:

·All steps

·Boss fights

·Puzzles

·Cutscenes

·Final objectives

Until the first team in the world completes the entire Easter Egg, Cursed Mode stays locked for every player.

Why Treyarch Chose a Community Unlock

Treyarch implemented a community-wide unlock for several reasons:

·It creates a worldwide race to complete the Easter Egg.

·It encourages collaboration between players

·It builds massive hype around the Zombies’ launch day

·It ensures every player experiences the main map first

·It avoids day-one skipping of intended story progression

Estimated Time Until Cursed Unlocks

Based on past Easter Egg races, such as Firebase Z or Shadows of Evil, we can estimate:

·4-12 hours for the top teams to figure out the full Easter Egg

·Under 24 hours for the community to finish and publish guides

So realistically, you can expect Cursed Mode to unlock within the first day of Black Ops 7’s global release.

How to Prepare for Cursed Mode Before Unlock Day

While waiting for the Easter Egg to be cracked, here’s how to get ready:

1. Learn the Map Layout

Study Ashes of the Damned in standard Zombies mode:

·Wall buy locations

·Perk machines

·Training areas

·High-traffic routes

The better you know the map, the longer you’ll survive in Cursed.

2. Practice Your Aim and Mechanical Skills

Cursed removes several assists, so precision matters a lot more.

Many players sharpen their fundamentals by practicing in Call of Duty Black Ops 7 Bot Lobbies, where you can safely work on recoil control, snap aim, and movement without interruptions. Some even choose to buy CoD Black Ops 7 Bot Lobbies for guaranteed solo practice time.

3. Prepare Your Operators and Cosmetics

While loadouts are disabled, your visual identity isn’t.

Make sure your favorites are equipped before launch day.

Final Thoughts

Cursed Mode is shaping up to be one of the most exciting additions to Call of Duty: Black Ops 7 Zombies. It brings back the authenticity and challenge of early Black Ops while introducing new systems, Relics, and seasonal progression.

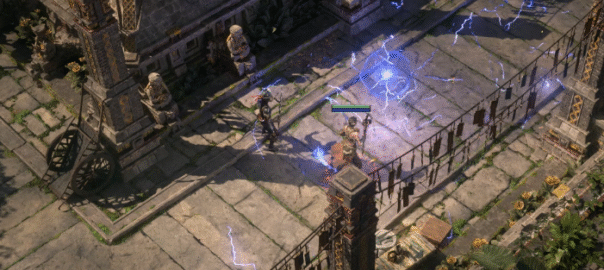
Path of Exile 2:How to Unlock the Well of Souls

Path of Exile 2 introduces a wealth of new systems, but one of the most intriguing is the Well of Souls. This hidden location, tied to the Abyssal League mechanics, allows players to desecrate Rare items and apply powerful, permanent modifiers-giving gear new potential at the cost of flexibility.

The Well of Souls is the core of Abyssal crafting. Here, you can use Desecrated Modifiers to transform Rare gear, permanently changing its properties. Unlike traditional crafting, once applied, these modifiers cannot be altered or removed. This permanence makes the system feel similar to corruption from Path of Exile 1 and makes the Well a critical tool for mid-game progression.

Because Abyssal mechanics appear early in Act 2, unlocking the Well quickly gives you a chance to experiment with Preserved Bones and other crafting items that can significantly upgrade your gear. Delaying this step may mean missing out on important mid-act power boosts.

Where to Find the Well of Souls

To reach the Well, you must uncover the Lightless Passage, a dungeon hidden in Act 2’s Mastodon Badlands-the same area tied to the A Theft of Ivory questline.

Follow these steps:

1.Travel to Mastodon Badlands-You’ll arrive here naturally while pursuing the Mastodon Tusks quest.

2.Check the Southwest Corner-The Lightless Passage usually spawns in this area. Look for a downward path framed by massive tusks.

3.Progress Through the Passage-Expect monster packs, rare enemies, and a guaranteed Rare spawn near a giant abyssal pit. You don’t need to fully clear the dungeon-just press forward until you find the entrance.

4.Unlock the Well-Once discovered, the Well of Souls gains a permanent map icon, allowing access anytime with any character.

Bonus Reward

If you clear Mastodon Badlands before entering the Lightless Passage, you can interact with a unique effigy to earn an Uncut Support Gem II. This extra step makes the journey even more worthwhile.

First Visit:Meeting the Hooded One

Your first encounter at the Well introduces the Hooded One, who communicates on behalf of the abyss-dwelling Lurking Creature. After this sequence, you’ll gain full access to the Desecration interface.

How Desecration Works

Crafting with the Well of Souls involves three stages:

1.Place a Desecrated Rare item in the abyssal frame.

2.Select one of three randomly generated Desecrated Modifiers.

3.Confirm your choice-locking the modifier onto the item permanently.

Desecrated items cannot be rerolled or altered by most crafting methods, so each decision carries real weight.

Preserved Bones

Desecration requires Preserved Bones, which drop from Abyssal Troves. Each type of bone applies to specific item slots:

Preserved Collarbone-Amulets, Rings, Belts

Preserved Cranium-Jewels

Preserved Jawbone-Weapons, Quivers

Preserved Rib-Armor

Preserved Vertebrae-Waystones

Once a Rare item is combined with POE 2 Currency the appropriate bone, it becomes Desecrated and ready for modification.

Things to Keep in Mind

While powerful, Abyssal crafting comes with strict limitations:

Permanent Modifiers-Once applied, they cannot be changed or undone.

Restricted Crafting Options-Desecrated items function much like Corrupted items and cannot use most currency.

Timing Is Key-Wait for strong base items before committing to a modifier.

Quest Progression-The Well only becomes accessible after reaching A Theft of Ivory in Act 2. Skipping exploration may cause you to miss it.

The Well of Souls is one of POE2 Currency for sale most impactful mid-game features. It offers meaningful customization with a risk-versus-reward tradeoff, echoing the corruption mechanics of the first game. Unlocking it early not only provides a steady stream of upgrades but also helps define the power curve of your build throughout Act 2 and beyond.

Stockpile Preserved Bones, plan your item bases carefully, and remember-once you commit to a Desecrated Modifier, there’s no turning back.

Path of Exile 2 Stormweaver Sorceress Build (0.3.0): Gear, Skill Gems, and Leveling Tips

The Sorceress remains one of the most versatile and beginner-friendly classes in Path of Exile 2, and the Stormweaver Sorceress build introduced in Patch 0.3.0 perfectly showcases her adaptability. With the Element Infusion System now live, this archetype can cycle between Fire, Cold, and Lightning Infusions, layering multiple debuffs while amplifying elemental burst potential. For new leagues and Solo Self-Found (SSF) players, this build stands out as one of the smoothest and most rewarding league starters in the game.

If you want a flashy, powerful, and reliable caster that doesn’t rely on expensive uniques or heavy trading, this Stormweaver Sorceress build guide will walk you through everything you need to know-from gear and skills to leveling strategies and endgame scaling.

Why Choose the Stormweaver Sorceress?

The Stormweaver setup blends the best of all elements: Fire for sustained damage over time, Cold for control and debuffs, and Lightning for explosive clearspeed. This flexible rotation ensures your build can handle every encounter type-from massive enemy packs to dangerous boss fights.

The new Element Infusion System allows the Sorceress to dynamically switch between elements, rewarding active spell rotation and intelligent casting. Instead of relying on one element, you’ll strategically layer Flame Wall, Spark, and Frost Bomb to trigger devastating reactions.

Pros and Cons

Like all Path of Exile 2 builds, the Stormweaver Sorceress has its strengths and weaknesses. Understanding both will help you optimize your experience early on.

Pros

·Accessible for everyone: Works perfectly in SSF or trade leagues with minimal gear requirements.

·Excellent AoE potential: Spark and Flame Wall melt mobs quickly.

·Strong bossing performance: Frost Bomb and Fireball deliver consistent single-target damage.

·Defensive flexibility: Hybrid scaling between Life and Energy Shield.

·High mobility: Fast cast speed and movement bonuses make the build smooth to play.

Cons

·Fragile early game: Survivability feels low until key defenses are unlocked.

·Mana-hungry: Frequent casting early can deplete your resources quickly.

·Infusion uptime required: Damage can feel inconsistent if you don’t maintain Infusions.

Build Progression – Early Game Pathing

The Stormweaver Sorceress is built for a comfortable start from Act 1 through early mapping. It’s a self-sustaining build that doesn’t rely on trading-though if you prefer a faster setup, you can always use POE2 Currency to acquire key upgrades early.

Early Gear Priorities

·Main Hand: Start with Ashen Staff (Firebolt) or Siphoning Wand (Power Siphon). Transition into Earthbound once it drops.

·Offhand: Use Twig Focus or Woven Focus for early damage boosts. You can also equip a shield if you’re struggling defensively.

·Armor: Focus on Energy Shield early. Tattered Robes will carry you until you find something sturdier.

·Boots: Movement Speed is the top priority throughout the campaign.

·Rings/Amulets: Stack resistances, mana regeneration, and intelligence. If gearing is slow, buy Path of Exile 2 Items to fill resistance gaps.

Stat Priorities

When upgrading gear or crafting, focus on stats that enhance both offense and sustain:

·Energy Shield & ES Recharge Rate

·Movement Speed

·Spirit and Maximum Mana

·Mana Regeneration Rate

·Elemental Resistances

·Cast Speed

·Critical Strike Chance and Multiplier

·Levels to Spell or Elemental Skills

Recommended Uniques

While this build performs well with generic gear, a few uniques can significantly enhance performance:

1. Luminous Pace

·+30 to Maximum Energy Shield

·10% Increased Movement Speed

·100% Faster Start of ES Recharge

2. Lifesprig

·+3 to Level of All Spell Skills

·+20 to Maximum Mana

·10% Increased Cast Speed

·Spell Life Leech

3. The Devouring Diadem

·+60 Life, +20 Intelligence

·+100% Energy Shield

·Bonus Chaos Resistance

4. Ghostwriting

·+100 Maximum Energy Shield

·Converts 25% of Life to ES

5. The Wicked Quill

·+100% Spell Damage

·Chance to inflict Withered on Hit

These items can often be crafted or traded for cheaply. If you want to speed up the process, buy POE2 Currency early to access these uniques faster.

Leveling Skill Setup

Your skill rotation evolves as you progress, but the foundation is built on Spark, Frost Bomb, and Flame Wall.

Core Skills

·Spark – Your main clearing skill; excels in tight areas and corridors.

·Frost Bomb – Reduces enemy resistances and applies massive Cold AoE damage.

·Flame Wall – Creates a damaging area that also buffs projectiles passing through it.

·Power Siphon – Provides Culling Strike and extra critical scaling.

Act 1 Additions

·Fireball: Great for both AoE and single-target encounters.

·Orb of Storms: Chains lightning between enemies, great for early clearing.

·Living Bomb: Adds early-game Fire DoT for crowd control.

Support Gems to Prioritize

·Controlled Destruction (Fire damage boost at the cost of crits.

·Unleash (Fireball): Automates repeats for smoother combos.

·Rapid Casting (Spark): Speeds up casting and mobility.

·Overabundance (Frost Bomb): Adds more charges per use.

·Spell Cascade (Frost Bomb/Orb): Expands AoE radius.

·Fortress (Flame Wall): Converts linear walls into circular AoE zones.

Passive Tree Priorities

The Stormweaver Sorceress focuses on efficient Energy Shield scaling and critical spell damage nodes while maintaining solid mana regeneration.

Early Game:

·Flat Spell Damage

·Increased Cast Speed

·Mana and Spirit Regeneration

Midgame:

·Hybrid Life + ES Clusters

·Elemental Damage and Critical Chance

·Infusion Uptime Enhancers

Endgame:

·Elemental Penetration

·Spell Multiplier Clusters

·Cooldown Recovery Nodes

Endgame Scaling and Survivability

Once you transition into mapping, your priorities shift toward survivability and sustained damage output.

·Hybrid Defense Scaling: Use a mix of Life and Energy Shield until you can fully transition into ES-based defense.

·Elemental Resistance Capping: Always maintain capped resistances to survive elemental-heavy encounters.

·Mana Management: Craft mana regen onto jewelry or use mana flasks with “increased recovery rate.”

With high cast speed and defensive scaling, the Stormweaver can survive almost any encounter while maintaining screen-clearing dominance.

Closing Thoughts

The Stormweaver Sorceress in Path of Exile 2 (0.3.0) is one of the best league-starter builds available. It’s a powerhouse combination of flexibility, damage, and accessibility-perfect for players who want a low-investment build capable of crushing both campaign and early endgame content.

By balancing elemental infusions, optimizing your Energy Shield sustain, and mastering mana management, you’ll find this Sorceress both rewarding and efficient. Whether you prefer to farm your own gear or buy Path of Exile 2 Items to accelerate progress, this setup scales beautifully into high-tier maps and late-game bosses.

For players seeking a build that’s visually spectacular, mechanically engaging, and fully capable of dominating every encounter type, the Stormweaver Sorceress is the perfect choice for Patch 0.3.0 and beyond.

Diablo 4 Season 9:Best Builds for the Infernal Hordes

Season 9 of Diablo 4 introduces a new endgame gauntlet:the Infernal Hordes. Found in the Realm of Hatred, this mode drops players into a series of time-limited enemy waves, where efficiency and damage output determine your survival and rewards. Each run is built around three key pillars:

Burning Aether:Collected from slain enemies and spent at the end on chests for loot.

Infernal Offers:Risk-versus-reward modifiers that boost your power but also increase the challenge.

The Fell Council:A culminating boss fight where your performance decides the final haul.

Entry requires an Infernal Compass, but succeeding requires a powerful build. Below are the top options for Diablo 4 Season 9:Sins of the Horadrim, all perfectly suited for farming Burning Aether and mowing through endless waves of demons.Purchase Diablo 4 gold from MMOexp now and start your path to victory!

1.Hydra Sorcerer – Unstoppable Flames

    The Hydra Sorcerer is a wave-clearing machine in Season 9 thanks to the Ophidian Iris amulet, which doubles Hydra damage and spawns each as a three-headed beast. With scaling mechanics that increase head count and size, Hydras quickly cover entire arenas in fire.

    This build excels because the Hydras do most of the work for you – burning mobs while you reposition or control the fight. Combined with Pyromancy passives, it offers incredible AoE, consistency, and safety.

    2.Quill Volley Poison Spiritborn – Toxic Rain of Arrows

      The Poison Spiritborn uses the Rod of Kepeleke to turn Quill Volley into an auto-critical, max-size basic skill. The screen floods with poisoned projectiles, overwhelming both hordes of trash mobs and tougher elites.

      It’s particularly strong in the compact maps of Infernal Hordes, where space control matters most. Gear investment is required, but once online, it’s one of the most dynamic and lethal hybrids for both waves and bosses.

      3.Pulverize Druid – Poison Quake Crusher

        The Pulverize Druid is built for durability and devastating area damage. With the Rotting Lightbringer, every Overpower triggers a 600% poison burst over seven seconds, stacking poison explosions with seismic slams.

        While slower than some options, it’s gear-friendly, durable, and beginner-accessible, making it an excellent entry build for players who want a sturdy option to farm Infernal Hordes.

        4.Balazan Poison Rake Spiritborn – Thorns That Kill

          This Spiritborn setup punishes enemies just for daring to attack. By pairing Razorplate with Balazan Maxtlatl, you stack enormous poison-based Thorns damage. Enemies melt simply by hitting you.

          It’s a semi-passive, low-APM build, perfect for relaxed farming or multitasking while waves die around you. The trade-off? It lacks burst potential and can be punished by ranged enemies if not carefully managed.

          5.Blood Wave Necromancer – Explosions Everywhere

            Even after nerfs, the Blood Wave Necromancer remains one of the strongest Infernal Horde options. The Tidal Aspect lets you unleash multiple waves, while Kessime Legacy pulls enemies together and amplifies corpse-based detonations.

            The build shines at wave control and AoE nukes, making it reliable for farming Burning Aether. It starts to fall off in ultra-high tiers (100+), but for mid-level farming it’s among the safest and most effective choices.

            6.Whirlwind Quake Barbarian – Perpetual Motion, Constant Quakes

              The fan-favorite Whirlwind Barbarian evolves in Season 9 with a quake-generating twist. By combining bleed-stacking Whirlwind with key aspects, you create a battlefield covered in earthquakes while constantly on the move.

              It may not match Hydra Sorcerer burst damage, but it offers high mobility, durability, and reliable sustained DPS, making it a top-tier farming build for Infernal Hordes.

              The Infernal Hordes are designed to test your ability to clear massive enemy waves quickly while balancing risk and reward. While nearly any build can eventually succeed with strong enough gear, these six stand out for their AoE potential, synergy with Season 9 mechanics, and efficiency in farming Burning Aether.Get your cheap Diablo IV Items from MMOexp today and dominate every battle with confidence!

              Whether you prefer Hydras doing the work for you, poison storms covering the screen, or the endless spin of a Whirlwind Barbarian, these builds will give you the edge in Diablo 4 Season 9.

              Diablo 4 Season 9: The Definitive Guide to Summoning the Blood Maiden

              When Season 9 of Diablo 4, Sins of the Horadrim, arrived, players quickly realized that one item would become the centerpiece of the endgame grind: Baneful Hearts. These consumables are the sole key to summoning the Blood Maiden, a new Helltide-exclusive boss that not only showers adventurers with loot but also fuels the seasonal Boss Ladder system.

              If you’re chasing Diablo 4 items, stockpiling Aberrant Cinders, or competing to climb the endgame boss ranks, mastering the Blood Maiden loop is mandatory. This guide breaks down everything you need to know: what Baneful Hearts are, how to farm them efficiently, where to summon the Blood Maiden, and why this fight is central to Season 9’s progression systems.

              What Are Baneful Hearts?

              Baneful Hearts are summoning consumables used exclusively during Helltide events. With one in your inventory, you can activate special ritual sites to summon the Blood Maiden.

              Unlike other bosses in Diablo 4, the Blood Maiden is fully tied to the Helltide system. This makes Baneful Hearts invaluable for three reasons:

              1. Boss Materials – The Blood Maiden drops Living Steel, Aberrant Cinders, and other crafting mats critical for high-level gear progression.

              2. Loot Fountain – Blood Maiden kills reward legendary and unique Diablo 4 items, making it a priority farming target.

              3. Boss Ladder Access – Baneful Hearts directly fuel Season 9’s Boss Ladder progression, giving competitive players a reason to stockpile and farm nonstop.

              In short: no Baneful Hearts, no Blood Maiden – and no endgame climb.

              Why Summon the Blood Maiden?

              Beyond the raw loot, the Blood Maiden is designed as a Helltide centerpiece boss, combining farming loops, consumable management, and strategic event play. She offers:

              ·Guaranteed Aberrant Cinders drops → used for Tortured Gifts

              ·Unique loot table with boss-specific Diablo 4 items

              ·High Baneful Heart return potential → by using Cinders to buy Diablo 4 Items Tortured Gifts, which can drop more Hearts

              ·Boss Ladder scoring for competitive players

              This creates the Helltide loop:

              1. Farm Baneful Hearts

              2. Summon Blood Maiden

              3. Kill her for loot and Aberrant Cinders

              4. Use Cinders on Tortured Gifts

              5. Open chests for more Baneful Hearts

              6. Repeat.

              Top Ways to Farm Baneful Hearts

              Baneful Hearts don’t drop everywhere – they’re tied to Helltides and their mechanics. Here are the best farming methods:

              1. Open Tortured Gifts (Primary Source)

              ·Drop Chance: ~15% base, with the pity system ensuring eventual drops

              ·Best Chests: Tortured Gifts of Mysteries (highest value), plus Weapon/Armor types

              ·Loop: Use Aberrant Cinders earned from Blood Maiden fights to open more Gifts → more Hearts → more summons

              Pro Tip: Always save at least 250-300 Cinders before summoning the Blood Maiden, so you can immediately reinvest into more Gifts after defeating her.

              2. Kill Helltide-Specific Enemies

              ·Targets: Helltide Assassins, Hellborne packs

              ·Drop Chance: ~1% with pity timer scaling

              ·Efficiency: High density of mobs = steady supply, especially when chain-clearing

              This method works best if you’re running a fast-clearing build like Storm Claw Druid or Whirlwind Barbarian.

              3. Defeat World Bosses During Helltide

              ·Guaranteed Drop: 3 Baneful Hearts

              ·Strategy: Track boss spawn timers via community tools and align your farming route with active Helltides

              Few sources match the efficiency of World Bosses during Helltides – missing these spawns means missing out on guaranteed Hearts.

              4. Complete Helltide Local Events

              ·Local events often spawn special chests or enemy waves that can drop Baneful Hearts.

              ·Best zones: Areas with clustered events, allowing you to chain multiple spawns without downtime.

              Look for Cultist Summoning Circles and Tornado Events, which spawn high-density packs and are particularly Heart-rich.

              5. Commander Events (Guaranteed Drops)

              ·Exclusive to Helltides

              ·Reward: 1 guaranteed Baneful Heart per completion

              ·Map Marker: Skull icon with glowing borders

              These are some of the best ROI events in the game – never skip a Commander spawn.

              6. Helltide Harbingers (Mini-Bosses)

              ·Spawn once your Helltide threat meter fills

              ·Drop Rate: Among the highest for Baneful Hearts

              ·Tip: Aggressive farming (constant killing, rapid event clears) fills threat faster, spawning Harbingers more often

              If you’re farming solo, prioritize Harbingers. If in a group, stack together to speed threat building.

              The Blood Maiden Farming Loop

              The most efficient strategy for Baneful Hearts is the self-sustaining Blood Maiden loop:

              1. Use Baneful Heart → Summon Blood Maiden

              2. Defeat Blood Maiden → Loot Aberrant Cinders & gear

              3. Spend Cinders → Buy Tortured Gifts

              4. Open Gifts → Acquire more Baneful Hearts

              5. Repeat cycle

              This loop can continue indefinitely if you maintain a balance between Cinder spending and Heart summoning.

              Pro Tip: Equip a pet companion to auto-pick up Aberrant Cinders. This keeps your farming momentum high and prevents missed drops.

              Best Farming Location: Gea Kul (Kehjistan)

              Among all Helltide rotations, Gea Kul in Kehjistan is regarded as the #1 farming spot for Baneful Hearts:

              ·Two World Events close together → easy chaining

              ·High density of Hellborne & Harbingers

              ·Commander events spawn frequently

              ·Open map design → quick visibility and movement between events

              Key events to prioritize in Gea Kul:

              1. Cultist Tornado Ambush → Spawns dozens of mobs quickly

              2. Summoning Circle → Portal cultists drop multiple Cinders and have decent Heart rates

              Note: Gea Kul only appears when Helltide rotates into Kehjistan, so monitor rotation timers.

              Extra Tips for Baneful Heart Farming

              ·Group Play: More players = faster clears, more Hearts per hour.

              ·Max Movement Speed: Boots, amulets, and skills like Teleport or Dash speed up rotations.

              ·Loot Filters: Hide junk items to reduce downtime.

              ·Track Timers: Use community Helltide trackers to never waste a farming window.

              ·Balanced Builds: Prioritize survivability – Helltide mobs hit hard, and losing Cinders on death wastes effort.

              Blood Maiden Fight Mechanics

              The Blood Maiden isn’t just a loot piñata – she has mechanics worth preparing for:

              ·Blood Pools – Persistent AoE zones that punish standing still.

              ·Summoned Minions – Adds spawn in waves; AoE builds clear them fastest.

              ·Empowered Phase – At 50% HP, she buffs herself with increased attack speed and damage.

              Counterplay:

              ·Stay Mobile → Mobility builds excellence here.

              ·Crowd Control → Use skills like Freezing, Stunning, or Taunting to control adds.

              ·Potions & Defensive Aspects → Don’t underestimate her empowered form; she can one-shot squishier builds.

              Why Baneful Hearts Matter in Season 9

              Season 9 introduced the Boss Ladder system, where players climb rankings based on kills, clear speeds, and loot efficiency. Baneful Hearts fuel this system by gating access to the Blood Maiden.

              Without Hearts, you’re locked out of the key:

              ·Boss Ladder progression

              ·High-value loot farming

              ·Efficient Helltide cycles

              As a result, farming Baneful Hearts is non-negotiable for serious players this season.

              Final Thoughts

              Baneful Hearts and the Blood Maiden have redefined Helltide farming in Diablo 4 Season 9. With the right strategy – Tortured Gift loops, Commander and Harbinger prioritization, and smart farming in Gea Kul – you can summon the Blood Maiden endlessly, stockpile Aberrant Cinders, and climb the Boss Ladder with ease.

              If you want to thrive in Season 9:

              ·Master the farming loop

              ·Never miss Commander or Harbinger events

              ·Plan around World Boss spawns

              ·Reinvest your Cinders wisely

              Do this, and the Blood Maiden won’t just be another boss – she’ll be your key to dominating Diablo 4’s endgame.